

17 Sourdough Starter Problems and Exactly How to Fix Each One
When I first started my sourdough journey, I read, watched, and researched every source I could find. I wanted everything to be perfect. I lovingly named my starter, put her in a jar, and fed her religiously. Then I waited. And waited. And convinced myself she was strong and ready for baking long before I should have. I’ve learned, the hard way, that sourdough is a process. It’s making mistakes and learning from them; it’s an evolution.
Sourdough starter problems can make a simple process feel complicated. But, take a deep breath, and before you throw it out, figure out what you’re actually looking at. A hungry starter, a cold starter, and a brand-new starter can need very different fixes.
These 17 common problems will help you decide what to change, what to leave alone, and when it’s time to clean the jar and start fresh.
Start Here: A Simple Feeding Reference
I feel like the most confusing part of sourdough starter is the mixed opinions on feeding ratios. I use a 100% hydration starter, which means I feed equal grams of flour and water.
When you see 1:1:1 for feeding, it simply means your starter, flour, and water will all weigh the same. So, if you have 5 grams of starter, you will feed it 5 grams of flour and 5 grams of water.
Use a kitchen scale, mix thoroughly, and mark the starting level on a clear jar. Cover it with a lid that allows gas to escape. Leave enough room for it to double or triple without climbing out.
These ratios describe how much to feed. They don’t tell you how often. A young starter needs its own establishment schedule; a mature starter’s feeding needs depend on temperature and how quickly it uses its food.

1. Your Sourdough Starter Isn’t Rising
What’s happening: Many things could be going on. The most common reason is that it’s just not ready yet, meaning you need to feed it more (not more weight, but more days) and give it time to strengthen.
It could also be too cold. In the winter, my kitchen is a bit too cold for my starter, so I put it on a warming mat, in the oven (no heat), or sometimes in the living room where it’s warmer.
It could also be underfed. If the top two issues don’t seem to be the problem, try adjusting your feeding ratio for a few days.
How to fix it:
Check the temperature in your room. Between 75-78 F is best for growth. Use a warming mat or move to a warmer spot in the kitchen.
Try a different kind of flour (make sure it’s unbleached), filtered water, or a larger feeding ratio.
If it’s new, continue your starter-creation method rather than switching to a rescue routine meant for a mature starter.
Change one thing at a time so you can tell what helped.
2. It Rose Like Crazy, Then Stopped
What’s happening: A new starter can have a dramatic burst of activity in its first few days, followed by a quiet stretch. That early rise can come from bacteria that are active before a stable sourdough community develops.
How to fix it:
Don’t stress. Keep feeding on schedule. The most important step here is not to rush your starter. You want to help it develop a routine; after it reliably rises after 3-4 feedings, you’ll know it’s ready.
3. It’s Bubbly but Won’t Double
What’s happening:
Bubbles show fermentation, but the starter could still not be strong enough yet. You’re on the right track, just a bit early in the process.
How to fix it: Confirm your measurements and use a straight-sided jar so you can see the rise more easily. Check it between feedings; it may rise and fall while you’re away. I use a Sharpie to mark where the starter is after feeding, so I can measure the rise later. These jars are also great.
For a new starter, keep watching the trend over several days. More bubbles and gradually faster rises are useful progress. A few bubbles alone aren’t a reliable green light for bread.
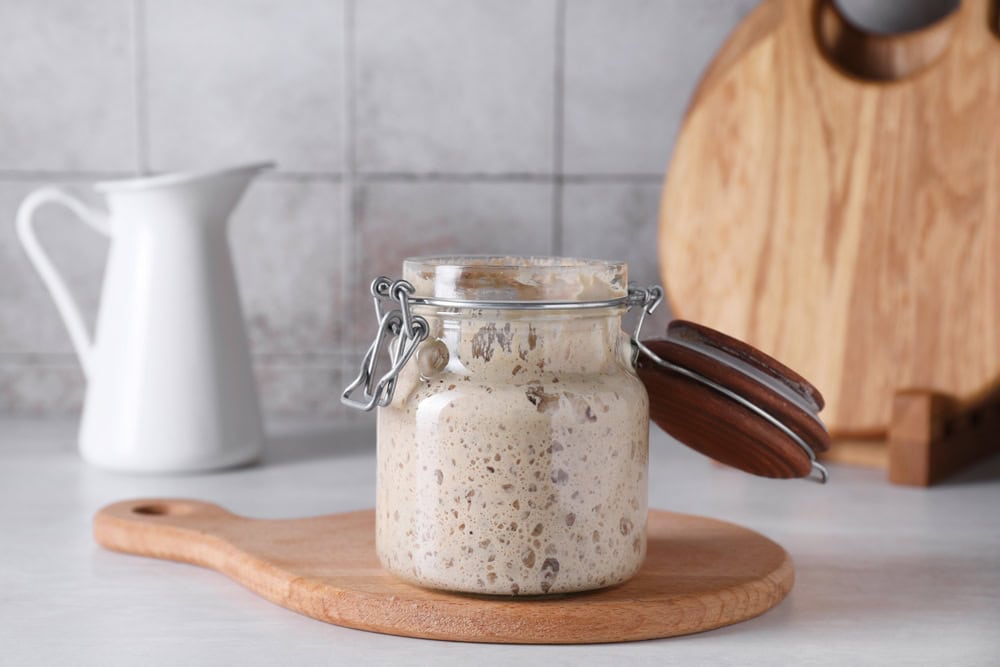
4. There’s Gray, Brown, or Black Liquid on Top
What’s happening: If your starter is established and then unfed for a day or two, it will produce a colored liquid on top. This is called hooch. Its ok. You can drain it off, or keep a little and mix it back into the starter for a tangier-flavored loaf.
How to fix it: Stir a small amount of hooch back in or pour it off, then feed the starter like normal.
If you will be gone or can’t feed regularly, put your starter in the fridge to slow its metabolism.
If hooch keeps appearing quickly, the mature starter may need more food per feeding or a shorter interval.
5. There’s Clear Liquid in a Brand-New Starter
What’s happening: Liquid separation in a young starter can happen when water separates from the flour. It isn’t automatically a sign that the starter has eaten everything and needs another feeding.
How to fix it: Stir it back in and check your measurements. Equal cups of flour and water produce a much wetter mixture than equal weights.
Follow your creation schedule and watch for developing activity. Repeatedly discarding and feeding a weak culture ahead of that schedule can dilute it and slow its progress.
6. It Smells Like Acetone or Nail Polish Remover
What’s happening: A sharp, solvent-like smell in an established starter often means it needs feeding. It doesn’t, by itself, mean you have to start over.
How to fix it: If there are no signs of spoilage, give it a measured feeding and observe the next cycle. A mature starter that peaks and collapses long before its next meal may do better with a 1:2:2 feeding or a shorter feeding interval.
The smell should soften as it returns to normal activity. A putrid or rotten odor, visible mold, or pink or orange discoloration means it’s time to discard it rather than feed it.
7. It Smells Strongly of Vinegar
What’s happening: This is due to the acids that sourdough produces. The longer the starter sits past its peak, the more acidic it will smell.
How to fix it: Refresh it regularly, and avoid repeatedly leaving it collapsed and hungry. If it races through a 1:1:1 feeding, try 1:2:2 and record how long it takes to peak.
Judge the whole picture: smell, rise, feeding history, and appearance. A sour smell in an otherwise healthy starter is different from a rotten smell. You don’t need to eliminate every trace of sourness.

8. Your Starter Is Too Runny
What’s happening: You may have added too much water, or the starter is hungry and needs feeding.
How to fix it: Check it right after feeding. For a 100% hydration starter, weigh equal amounts of fresh flour and water. It should be a bit thick, like pancake batter.
If it’s thick after feeding but runny later, review your feeding timing.
9. Your Starter Is Too Thick
What’s happening: It may contain too little water, or you may be using flour that absorbs more water. It could also be a stiff starter behaving exactly as intended.
How to fix it: Measure accurately, and make sure you’re using a 100% hydration starter. If you are using a dryer formula, this could be correct for your starter. Mix until there are no dry pockets of flour left after feeding.
10. It Gets a Dry Skin on Top
What’s happening: The surface is drying out
How to fix it: Replace the cloth or towel with a loosely fitted lid.
If you can’t confidently distinguish dry skin from growth, discard it.
11. It Has Fuzzy Mold
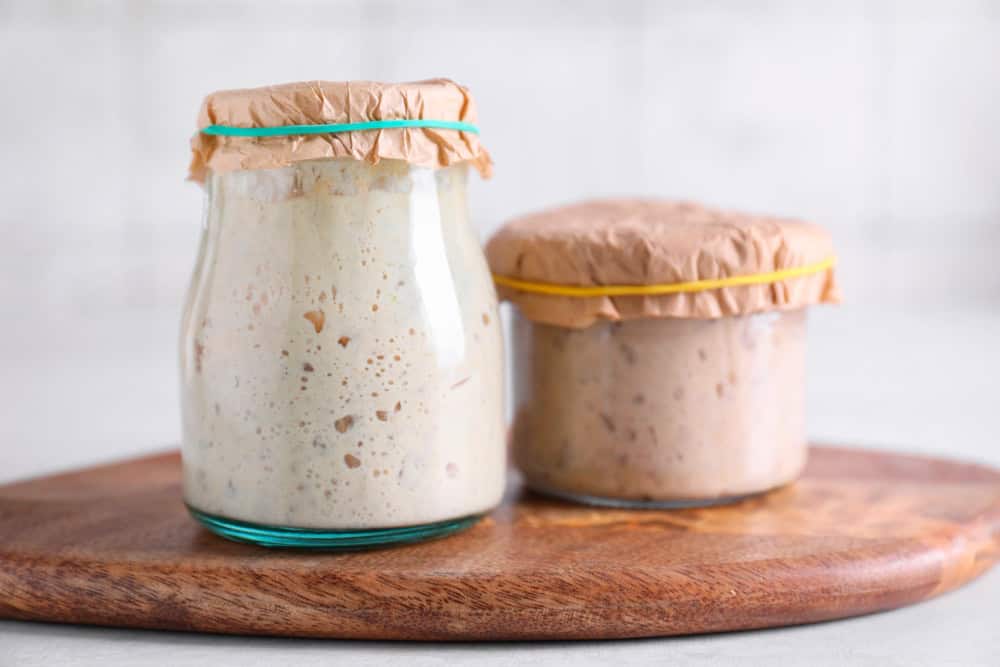
What’s happening: The starter is contaminated. Fuzzy growth on the starter or dried residue inside its jar won’t feed away.
How to fix it: Throw it away—all of it. Wash and sanitize the container and utensils before starting again, or use an uncontaminated backup kept separately.
I know throwing it out is frustrating after all that feeding and waiting. This is one problem where saving a little flour isn’t worth it.
12. It Has Pink or Orange Streaks
What’s happening: Pink or orange discoloration means the starter has been contaminated and must be thrown away.
How to fix it: Toss the entire starter, clean the equipment, and start over.
This is different from ordinary gray or brown hooch. The hooch will sit on top; contamination will streak throughout.
13. It Fails the Float Test
What’s happening: The float test measures whether a spoonful holds enough gas to float.
How to fix it: Track the rise after feeding instead. For a typical starter fed 1:1:1 in a warm room, watch for consistent doubling within roughly four to eight hours, plenty of bubbles, and an airy texture. These are better signs than the float test.
That window changes with temperature, flour, and feeding ratio. Use several successful feeding cycles to judge a new starter, and aim to mix your dough near the starter’s peak.
14. It Rises and Collapses Before You Can Use It
What’s happening: It may be healthy and simply moving faster than your schedule.
How to fix it: Feed closer to when you plan to mix dough, move it somewhere slightly cooler, or try a larger feeding ratio. A fallen starter isn’t dead, but feeding again and using it near peak makes beginner baking more predictable.
15. It Slows Down When Your Kitchen Gets Cold
What’s happening: Fermentation slows as temperatures drop.
How to fix it: Move it to a stable, gently warm spot and use lukewarm rather than hot feeding water. Check the actual temperature with a thermometer; a windowsill or an oven with the light on can get hotter than you expect.
Avoid direct heat, and give a cool starter more time.

16. You Forgot to Feed It
What’s happening: A mature starter can often recover from a missed feeding or a longer fridge stay. Neglect and spoilage aren’t the same thing.
How to fix it: Inspect it first. Be sure there is no mold, rotten smell, or discoloration. If not, keep a small portion and resume measured feedings at room temperature.
Once a starter is mature, refrigeration with regular maintenance can make occasional baking easier. For an extended break, dry a healthy portion to keep a separate backup.
I travel 2-3 weeks each month, I have kept my starter alive, and healthy for over 3 years by placing her in the fridge before each trip, and warming her back up and feeding when I get home.
17. Your Starter Rises, but Your Bread Is Still Dense
What’s happening: A starter can show some activity without being strong enough for the recipe. But dense bread also comes from dough problems, including insufficient fermentation, weak gluten development, and cutting before the loaf has cooled.
How to fix it: Start by confirming that your starter rises predictably after feeding and use it near peak. Build strength through stretch and folds, and be sure its done with bulk fermentation before baking.
Before You Change Everything
Make notes, keeping track of your feeding ratio, room temp and how long the starter takes to peak. Check for any patterns or details that will help you determine the problem. Only change one thing at a time, and give it a few days to recover before changing everything or tossing it.
Most sourdough starter problems need an adjustment and a little time.


